Home       Pictures       Videos       Projects       Contact Me

Thursday, January 23, 2025

Discovering Czech Glass 32-Sided Crystal Ball Fortune Dice: How I Recreated the Lost Instructions

A few years ago, I stumbled upon a set of Czech Glass 32-Sided D32 Dice, and I quickly became hooked. These little glass orbs, with their 32 numbered sides, captivated me with their mysterious origins and their connection to fortune-telling. But it wasn't just the beauty of the dice that fascinated me—it was the bizarre and sometimes hilarious instructions that came with them. If you're into quirky collectibles or have a soft spot for mystical tools, you're in for a treat!

I was lucky enough to track down a copy of the original instructions after finding only a blurry photo online. After some work, I was able to recreate the guide, and today, I’m sharing it with you in a downloadable PDF format. Whether you're into divination or just enjoy unusual objects, these dice—and their instructions—are sure to spark curiosity.

What Are Czech Glass 32-Sided D32 Dice?


These crystal fortune dice, which originated in Czechoslovakia around 1930, are unlike anything you'd expect. Each die is made of lead crystal and features 32 sides, numbered 1 to 30, with a 0 and a 00 at the top and bottom. They were marketed as a fun “Crystal Ball” for divination, promising to answer all your questions about love, marriage, luck, and finances.

One of the most fascinating aspects of these dice is their rarity. Since first discovering them, I’ve only come across around 20 or so sets, which makes finding them in good condition a bit of a rarity. While some sets come with the original instructions and packaging, many don’t—and that’s where the mystery begins.

The Mystical Origins and Uses

Czech glass is renowned for its quality and craftsmanship, and these fortune dice are no exception. Crafted from lead crystal, the dice were designed to reflect light and provide that magical, otherworldly glow. Historically, these dice were part of the broader fortune-telling and divination trends of the early 20th century, when new products were developed to help people "read" their futures in the comfort of their own homes.

At the time, fortune-telling was still a controversial subject, so the dice were marketed more as a "game" or "amusement" to skirt around any legal issues. In fact, the packaging proudly claimed that the dice were meant for “amusement,” using a phrase like “Be a Crystal Gazer and give amusement to your friends.”

But these weren’t your average fortune-telling tools. The dice came with instructions that promised to predict everything from your love life to your financial future, and some of these instructions are downright hilarious.

The Instructions: A Mix of Mystical and Bizarre


So, what kind of wisdom do these dice offer? Let’s dive into some of the most amusing and bizarre bits of advice that can be found in the instructions:

  • Love (Number 4): "Your life partner will be horribly jealous."
  • Marriage (Number 12): "Don’t marry the good looking one."
  • Luck (Number 29): "You will own automobiles and have every convenience of wealth shortly."

I can’t help but laugh at the sometimes absurd nature of these predictions. It’s a mix of fortune-cookie style humor and genuinely puzzling advice. Whether you take them seriously or not, it’s clear these dice were meant to entertain just as much as they were meant to "divine."


The Hunt for the Instructions

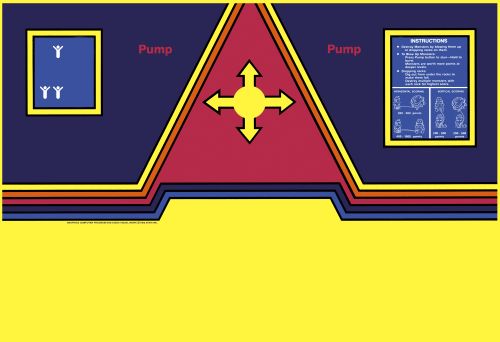
When I first got my hands on one of these dice, I was thrilled by the mysterious allure they held. But one problem quickly arose: the instructions were nowhere to be found. After scouring the internet for any trace of guidance on how to use the dice, I finally tracked down a single blurry photo of what appeared to be the original instructions. Armed with that image, I set to work recreating the guide.

It was no easy task. Deciphering the symbols, aligning them with the correct meanings, and formatting it all into a usable document took time. But after several attempts and a lot of patience, I finally had something that resembled the original instructions. And now, I’m excited to share it with you!

Recreating the Instructions: A Labor of Love

Recreating the instructions was like solving a puzzle. Some of the symbols were relatively straightforward, while others required more interpretation. In the end, I compiled everything into a cohesive guide that would allow anyone with a Czech Glass D32 Die to use it for its intended purpose—fortune-telling.

The process was long and challenging, but every step of the way felt like uncovering a lost piece of history. Now, I’m excited to offer these instructions to you in an easy-to-download PDF format.

How to Use Your Czech Glass 32-Sided D32 Die

If you’ve managed to find one of these dice (or are thinking about getting one), you’re in for a treat! Using the die is simple. You roll the dice, and the number on the side that faces up corresponds to one of the predictions in the instructions. Each number is associated with a category—like love, marriage, or luck—and provides a unique prediction.

Here’s a quick sample of the kind of predictions you might find:

  • Love (Number 4): “Your life partner will be horribly jealous.”
  • Finance (Number 19): “Financial gain is in your future, but be careful with your spending.”
  • Luck (Number 29): “You will own automobiles and have every convenience of wealth shortly.”

It’s a fun and sometimes funny way to get a glimpse into your future—or just enjoy a good laugh with friends.

Download the Instructions

Ready to unlock the mysteries of your Czech Glass 32-Sided D32 Die? You can now download the recreated instructions below and start divining your own future.


Click here to download the PDF

This pdf prints perfectly on 11x17" paper which is easily avialble for a few dollars at any FedEx Print Store.

Finding and using these Czech Glass 32-Sided D32 Dice has been a fascinating journey for me. Between the beauty of the crystal, the quirky instructions, and the historical significance, these dice offer a unique glimpse into a time when fortune-telling was both a game and a mystical practice.

I hope you find as much joy and amusement in using these dice as I have. Whether you believe in their predictions or just enjoy their aesthetic, they’re sure to add a little magic to your collection. And if you’ve found any other quirky fortune-telling tools or have your own experiences with these dice, drop me a comment below! I’d love to hear your stories.

Thursday, December 6, 2012

Dig Dug Arcade Cabinet

I guess I've ignored this blog for long enough now. March was the last time I posted and since that time I've been plenty busy with all manner of projects. From finishing the attic remodel to brewing beer and doing various around the house things I've been quite productive. Sadly it would take me far too long to go over all the stuff I've missed posting about over the last nine months so I'm going to focus on the one big project that has kept me the busiest.

Building an Arcade Cabinet

For years I've heard about people who build their own arcade cabinets to play old video games and the idea was always in the back of my mind.  Finally after mulling the idea over for about 10 years or so I set out to build my own arcade cabinet.

I hit the internet hard and started to learn all I could about how to go about building my own cabinet.  I really liked the look of the classic Dig Dug arcade cabinet (see right) so I decide that I would build my very own Dig Dug arcade cabinet.

I knew right away that I couldn't make an exact replica of Dig Dug as I wanted to have two sets of player controls on the control panel and I also wanted a trackball for games like Golden Tee, Missile Command and Marble Madness.  I would also need a widescreen monitor for new games like Street Fighter IV and Super Meat Boy.

Before I could do anything I had to be sure I could make this thing work.  Rather than put this idea on the back burner once again I ordered some Joysticks and Push buttons from Ultimarc and I set out to build a test system to be sure I could pull this project off.

Shortly after everything arrive I started to piece together my test cabinet.  I took some old plywood, drilled some holes, sanded it down and started to wire up the control panel.  After a few hours of wiring and trying to figure out what the hell I was doing I ended up with a pretty good control panel.

So far so good but it didn't really look like much of an arcade cabinet yet.  In fact it looked more like a board with some buttons in it and a tangle of wires underneath.  Definitely not like the Dig Dug cabinet you see above.  What I really needed was a frame for this thing and a monitor.

I made a frame out of some spare 2x4s I had in the basement and mounted a 32" monitor on it so I could begin testing.  I hooked up my computer and fired up Mame to test come games.  Nothing worked.

At this point I was racing against the clock as I had a bunch of friends coming over for your annual Drunkin' Bike Rides and what would be a better time for testing an arcade cabinet then with a bunch of drunk people?

I took a quick break from working on the control panel and focused my attention on cutting down the sides to the arcade cabinet.

I had purchased some MDO a few weeks prior and I had been itching to get those cut down.  Without any size measurements from an actual Dig Dug arcade cabinet I decided to go with some measurements from a Centipede cabinet (available here) and modify it a bit.  Centipede looked close enough to a Dig Dug cabinet so I essentially I just winged it and hoped for the best.

With the sides cut down I could again return my focus to the broken control panel.  A lot of internet research later and a few more hours working on the control panel and I finally had something that worked.  Not only could you play games but with the sides leaned against the frame it was starting to actually look like an arcade cabinet.

After the test run at Drunkin' Bike Rides we had a system that worked and could stand up to drunk people abusing it for hours on end.  Now I could get to work on building something that looks even more like an arcade cabinet.  I took the leftover MDO from the side panels and started to cut down the rest of the pieces needed for the cabinet.

This is where construction took a major slowdown.  I talking to my wife and we both thought it would be cool if this thing took actual quarters.  After all if you are going to build a full sized arcade cabinet it might as well look legit.  Unfortunately a coin door was not in my original budget so I had to hold off on construction for a bit before I could afford the coin door.

Flash forward about a month or two and now we have something that looks like an arcade cabinet.  I ended up not using the original 32" monitor and instead opted for a 27" monitor.  This put construction on hold for a second time while I set aside extra cash for a monitor that wasn't in the original budget.

This second hold on construction gave me the perfect opportunity to work on the graphical elements of the arcade cabinet.

When I added the second set of controls, trackball and widescreen monitor I ended up making the cabinet much wider than the original Dig Dug cabinet.  This meant that I had to recreate new wider artwork for the whole project.

Over at the Arcade Art Library I was able to find Illustrator files for the Dig Dug marquee and brezel.  With these in hand I was able to recreate both a wider marquee and brezel which would fit my cabinet.

Original Dig Dug Brezel
Widescreen Dig Dug Brezel I created
Original Dig Dug Marquee
Wider Dig Dug Marquee

As you can see the artwork is not only wider but it still looks like the original Dig Dug artwork.

The Arcade Art Library also had the control panel overlay and the side art but I decided to go a different direction with those.  For the side art I figured I would just order the Dig Dug version available at gameongrafix.com(http://www.gameongrafix.com/products/dig-dug-sideart)  They already had the side art ready to order so why waste time recreating it?

The control panel was a different story completely.  Since my cabinet was not only wider but had more buttons I would have to redesign the entire overlay while keeping as close to the original design aesthetic as I could.

Original Dig Dug Control Panel Overlay
New Dig Dug Control Panel Overlay

In the end I thought I came pretty close to the original design even if I did have to lose some of the original artwork in the process.

With my graphics finalized and the extra money saved up for the new monitor I put in my order to gameongrafix.com for the artwork and to newegg for the monitor.  While I waited I primed and painter all the parts.

Once the last of the parts arrived I put everything together and this is what I ended up with.


Not bad for a complete woodworking novice.  While it looked finished I still had some work to do.  I did spend some time doing a few other odds and ends to make it seem more like an arcade cabinet.  One of the major drawbacks of having a PC inside an arcade cabinet is that when you boot into Windows you get the default windows branded boot screen.  So I changed the Windows 7 boot screen from this....


...to this.


I also changed the default wallpaper to something a bit more arcade-y.


The computer now boots directly into a program called Hyperspin so unless you know what you are looking for you only see the Dig Dug loading screen and then the wallpaper for a few seconds before the Hyperspin front end takes over.

In the end it turned out be a fun project but as with any project there are a few things I would change if I did it all over again.  We had a few people over to the house two weeks ago and the arcade cabinet got quite the workout.  Besides a few little tweaks here and there it performed perfectly with "Tapper" being by far the most played game.

I can't wait to spend the winter months plugging quarters into this thing.

Tuesday, March 27, 2012

Amalgamation (NSFW)

A while back I was up late and I just started writing a story.  It was a really free form, first thing in my head type of story.  I ended up writing for about forty-five minutes before my mind started to wander to other activities.  Primarily those activities included drawing/doodling and Photoshop.  So I saved my Google document and picked up a piece of junk mail and started to do some preliminary sketches of what was in my head.  This lasted for quite a while before I moved on to Photoshop to create those sketches in a more suitable draft form.  I ended up playing in Photoshop for too long and I then started to think about turning those images into moving video.  So I busted out Final Cut and started to play around with video editing for a bit.  All and all I ended up spending about 8 hours doing non stop creative work.  Just me and the computer and a pair of headphones.

At the end of those 8 hours I didn't end up with a lot of finished work.  In fact I didn't end up with any finished work but the mere act of spending so much time just creating was invigorating.  The one thing I did end up with when I finally walked away from the computer was a lot of good ideas for stuff I'll probably never follow up on or finish.  There was one piece I was playing with right before I went to bed that is about as close to finished as it is ever going to get.

Toward the end of the night I gave up on trying to work with my random ideas and just started to work with what was in front of me.  I decided on doing something different so I hit popular websites like Tumblr and digg and just started to save pictures and .gifs by the hundreds.  I then threw them all into a timeline to see what would come out.  Really it was just a creative experiment to see what I could make in an hour.  At the end of an hour I would stop what I was doing and go to bed.  I wouldn't even look at what I created for a few days.  I woke up the next day and promptly forgot about my final hour of creativity.  Last night I pulled up those work files again and this is what was left after an hour of random searches.


This Animation is NSFW! You've been warned.

Amalgamation Animated .gif


This amalgamation of images and animations were all found in about 15 minutes just by clicking on random things and seeing what I could see.  The last 45 minutes were spend placing them in this particular order and getting rid of images I didn't want to use.

I'm not sure I would call this art.  In fact now that I'm looking at it again I'm not sure I would necessarily call it creative.  I'm simply calling it Amalgamation and I do find it interesting so I'm sharing it with everyone both of you who read this blog.  Hopefully in the future I can find more half finished projects to share with you because over the last three months I've been pretty lazy about posting to this blog.

Thursday, March 22, 2012

First Post of 2012

In an effort to post something this year...


Just a little astronaut doodle I did during a meeting a few weeks back.  Hopefully I'll have something interesting to say at some point in the future.

Wednesday, December 28, 2011

Post Holiday Hangover


I just found the above picture while going through my RSS feeds. I was going to save it to post next Christmas but I don't think I would remember to do that so here it is now.

Anyway I've been laying low for awhile now while trying to get through the Holidays. With Christmas over and done with I can now move on to other things.

On Monday I hit up the hardware store and got to work in the kitchen. For those of you who have been to my house you might remember our kitchen looking like this.


Only with a bit less Kyle.

A few months back our microwave stopped working so we bought a cheap one and put it on a table next to the stove. Now that I had some free time I decided to take down the old microwave and the cabinet above it. This is how our kitchen looks now that I've done a bit of remodeling.


Not bad for a few hours of work.  It's amazing how long I've been talking about doing that and it only took about four hours to finish.  Most of that time was waiting for paint to dry.  For my next project I think I'm going to get around to building that kitchen table I've been thinking about for a few years now.

Sunday, December 25, 2011

Happy Holidays

This Holiday season has been an exceptionally busy one for me.  Lots of last minute running around and spending lots of time with friends and family.  I'm looking forward to some serious downtime over the next few days and I hope you get to enjoy some time off too.

To help celebrate the holiday I found this video Christmas card by Terry Gilliam for you to enjoy.


Wednesday, December 14, 2011

New Futons


I don't have much to say about this other than we have the new futons in the Bradttic.  Now that they have arrived I'm not too sure about the rug or the coffee table but for now it's all good.  I'll worry about interior design after the whole thing is finished.

Tuesday, December 13, 2011

End in Sight

This past weekend I ended up getting the trim around the windows in the attic.   All and all I think they turned out pretty good.  Shortly after taking these pictures we ended up getting our new Futons delivered for the attic. I'll have to take a picture of those tomorrow so I can show you how they look.  Very exciting to see this project come to an end.


Thursday, December 8, 2011

Window Trim

It's been a busy week around here. School is wrapping up for the semester and the holidays are right around the corner. I'm trying to get as much done as I can in between those two major things. Tuesday night I had a bit of time to myself so I took the wood I'm using for window trim in the attic over to a buddies house to have it ripped down. Tonight I made the last of the cuts and put a first coat of paint on the trim.


Hopefully tomorrow night at this time I'll have a second coat of paint on those boards. I'd like to have both the windows trimmed out and finished by Saturday morning but that all depends on how much painting I can get in before then.  With any luck I'll get two more coats on between now and then.

Friday, December 2, 2011

The Octopus That Walked On Land

If you have been following my blog for a bit of time you are well aware that I am frightened of both aliens and octopuses to an almost unreasonable degree. I first brought this up back in 2008 and again last January when I found out that octopuses can use tools. I've also made mention of my Alien fears here and here.

Now for the longest time I would say my fear of aliens far outweighed my fear of octopuses.  After all as long as I wasn't in the ocean I would be safe.  Or so I thought....  Lately there have been a lot of discoveries concerning the cephalopod mollusc of the order Octopoda.  You see the discovery of an octopus using tools in early 2010 was pretty creepy but not nearly creepy enough for me to be afraid of an ocean dwelling creature more than a flying alien who comes in the night and could abduct you at any time from anywhere.

Then I found this video.


That's right the octopus just walked on land.  Did you see that video?  It fucking walked on land!

Not only is it walking on land but it is doing it in the most creepy way imaginable.  Go back and watch that video again.  At the 2:10 mark it even drops off the dead body of it's latest victim.  I am so creeped out right now I barely have the words.

Octopus is now the new #1 fear.  Aliens are a very close second.  The only thing I have going for me right now is that I live in the Midwest. UPDATE: 7:39 AM Apparently octopus walking around outside the ocean happens all the time.
Extra super creepy now.