
Building an Arcade Cabinet

I hit the internet hard and started to learn all I could about how to go about building my own cabinet. I really liked the look of the classic Dig Dug arcade cabinet (see right) so I decide that I would build my very own Dig Dug arcade cabinet.
I knew right away that I couldn't make an exact replica of Dig Dug as I wanted to have two sets of player controls on the control panel and I also wanted a trackball for games like Golden Tee, Missile Command and Marble Madness. I would also need a widescreen monitor for new games like Street Fighter IV and Super Meat Boy.
Before I could do anything I had to be sure I could make this thing work. Rather than put this idea on the back burner once again I ordered some Joysticks and Push buttons from Ultimarc and I set out to build a test system to be sure I could pull this project off.

So far so good but it didn't really look like much of an arcade cabinet yet. In fact it looked more like a board with some buttons in it and a tangle of wires underneath. Definitely not like the Dig Dug cabinet you see above. What I really needed was a frame for this thing and a monitor.
I made a frame out of some spare 2x4s I had in the basement and mounted a 32" monitor on it so I could begin testing. I hooked up my computer and fired up Mame to test come games. Nothing worked.
At this point I was racing against the clock as I had a bunch of friends coming over for your annual Drunkin' Bike Rides and what would be a better time for testing an arcade cabinet then with a bunch of drunk people?

I had purchased some MDO a few weeks prior and I had been itching to get those cut down. Without any size measurements from an actual Dig Dug arcade cabinet I decided to go with some measurements from a Centipede cabinet (available here) and modify it a bit. Centipede looked close enough to a Dig Dug cabinet so I essentially I just winged it and hoped for the best.
With the sides cut down I could again return my focus to the broken control panel. A lot of internet research later and a few more hours working on the control panel and I finally had something that worked. Not only could you play games but with the sides leaned against the frame it was starting to actually look like an arcade cabinet.
After the test run at Drunkin' Bike Rides we had a system that worked and could stand up to drunk people abusing it for hours on end. Now I could get to work on building something that looks even more like an arcade cabinet. I took the leftover MDO from the side panels and started to cut down the rest of the pieces needed for the cabinet.
This is where construction took a major slowdown. I talking to my wife and we both thought it would be cool if this thing took actual quarters. After all if you are going to build a full sized arcade cabinet it might as well look legit. Unfortunately a coin door was not in my original budget so I had to hold off on construction for a bit before I could afford the coin door.

This second hold on construction gave me the perfect opportunity to work on the graphical elements of the arcade cabinet.
When I added the second set of controls, trackball and widescreen monitor I ended up making the cabinet much wider than the original Dig Dug cabinet. This meant that I had to recreate new wider artwork for the whole project.
Over at the Arcade Art Library I was able to find Illustrator files for the Dig Dug marquee and brezel. With these in hand I was able to recreate both a wider marquee and brezel which would fit my cabinet.
 |
| Original Dig Dug Brezel |
 |
| Widescreen Dig Dug Brezel I created |
 |
| Original Dig Dug Marquee |
.jpg) |
| Wider Dig Dug Marquee |
As you can see the artwork is not only wider but it still looks like the original Dig Dug artwork.
The Arcade Art Library also had the control panel overlay and the side art but I decided to go a different direction with those. For the side art I figured I would just order the Dig Dug version available at gameongrafix.com. (http://www.gameongrafix.com/products/dig-dug-sideart) They already had the side art ready to order so why waste time recreating it?
The control panel was a different story completely. Since my cabinet was not only wider but had more buttons I would have to redesign the entire overlay while keeping as close to the original design aesthetic as I could.
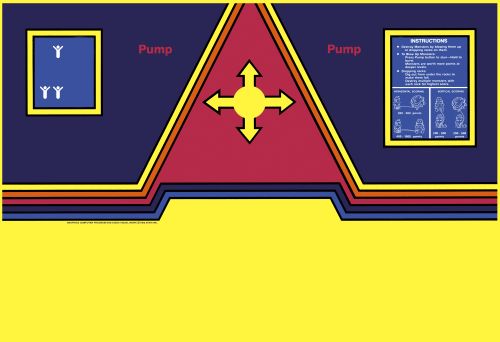 |
| Original Dig Dug Control Panel Overlay |
.jpg) |
| New Dig Dug Control Panel Overlay |
In the end I thought I came pretty close to the original design even if I did have to lose some of the original artwork in the process.
With my graphics finalized and the extra money saved up for the new monitor I put in my order to gameongrafix.com for the artwork and to newegg for the monitor. While I waited I primed and painter all the parts.
Once the last of the parts arrived I put everything together and this is what I ended up with.


Not bad for a complete woodworking novice. While it looked finished I still had some work to do. I did spend some time doing a few other odds and ends to make it seem more like an arcade cabinet. One of the major drawbacks of having a PC inside an arcade cabinet is that when you boot into Windows you get the default windows branded boot screen. So I changed the Windows 7 boot screen from this....

...to this.

I also changed the default wallpaper to something a bit more arcade-y.

The computer now boots directly into a program called Hyperspin so unless you know what you are looking for you only see the Dig Dug loading screen and then the wallpaper for a few seconds before the Hyperspin front end takes over.
In the end it turned out be a fun project but as with any project there are a few things I would change if I did it all over again. We had a few people over to the house two weeks ago and the arcade cabinet got quite the workout. Besides a few little tweaks here and there it performed perfectly with "Tapper" being by far the most played game.
I can't wait to spend the winter months plugging quarters into this thing.


4 comments:
Holy crap. That's incredible. If there was a hook, it would be off of it.
How much would you charge to build me one for my new basement? Hehe...
It actually wasn't that much work to build it. It was just a lot of waiting so I could afford stuff. If you want to build one I'd be willing to help.
Wow this is amazing! Great work!
Thanks, it was a really fun project.
Post a Comment